Self Treatment Guide for Shoulder Separation

If you’ve got lingering shoulder pain following a nasty fall or direct blow to the shoulder, made worse by reaching across your body, you may have suffered a shoulder separation.
This is caused by the stretching or tearing of the ligaments of the AC joint. It’s a common injury among hard-hitting sports like football, rugby, and hockey. Or it also shows up in everyday life due to an unfortunate accident.
While they can be painful injuries, that cause swelling and an odd looking shoulder, most will progress with time and guided therapy. In this article, we’ll take a look at the types and plan of attack to help you get past your shoulder separation.
Know Your Grades and Recovery Timeline
Before going any further, let’s identify what’s going on.
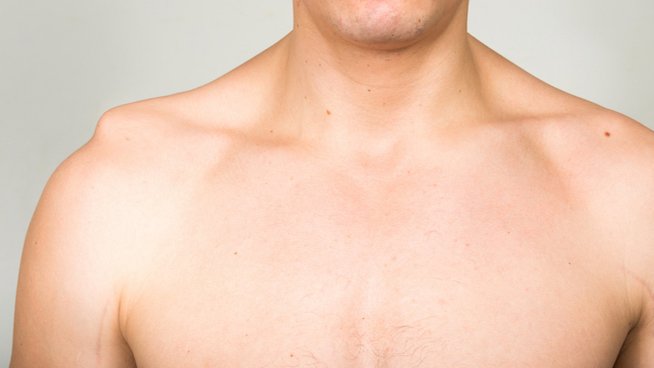
Start by locating your collar bone and then trace it to where it meets your shoulder. You’ve found your acromioclavicular joint, or better known as the AC joint.
Notice the collection of ligaments that hold it all together. It’s the tearing or stretching of these ligaments that cause a shoulder separation.

There are six categories of shoulder separation based on the size, structures involved, and type of displacement,
Grades I and II

While they are painful and may present with swelling and a bump over the shoulder, they most likely don’t need surgery. They will return to normal within a few weeks to a couple of months with rest and exercise.
What to expect:
- Grade I tears will need 1-2 weeks out of activity
- Grade II tears anywhere from 3-6 weeks.
Grade III

Grade III separations involve the tearing of the coracoclavicular ligaments as well. This causes a complete separation of the clavicle and shoulder. These are easy to spot by a stair step that is formed over the shoulder.
It’s a more complicated issue because there isn’t consensus within the medical community on the best way to manage a Grade III tear. Even with new surgical procedures, the outcomes are nearly identical with and without surgery.
So it’s logical to approach a grade III tear conservatively to avoid the expense and potential complications of surgery. But individual factors such as goals, competitive level, and sports activities need to be weighed as well.
This makes a consult with an orthopedic specialist worthwhile to determine the best course of action.
What to expect:
As mentioned, there isn’t a consensus on the best treatment for a Grade III separation. The standard procedure is 3-weeks of rest and rehab and then consider surgery if there is little improvement.
The rehab process is like the grade I and II separations, yet may demand up to 3 months before a return to activities. It may also need more intensive strengthening to make up for the loss in stability. Again, another reason to get medical help for these injuries.
Grades IV, V, VI
The later grades (IV-VI) are less common and much more severe and usually caused by major impacts like car accidents. They are more advanced medical cases or even sometimes medical emergencies. These will need surgery and don’t fall into the scope of this article.
Shoulder Separation Treatment Guide
If you want a general understanding of the treatment approach to a shoulder problem then read The Approach to Shoulder Pain. It’s a nice overview of the plan of attack.
More specific to shoulder separation rehab uses the following treatment guide as a tool. This is directed at Grade I and II tears, anything more severe get it checked out.
1. Screen
If you suspect an AC separation start with a screen for more advanced issues. A quick run through our Red Flag Screen is a good start to pick these things out.
This is designed to identify things that need further medical evaluation. Click here to take the screen: Red Flag Screen.

If nothing turns up there’s a good chance you can manage this on your own. But if you’re ever in doubt, rest easy by seeing a doctor about your issue.
2. Address Pain
Start by addressing the pain. Because you don’t want to live in misery, but it will also get you moving quicker, which is important to the recovery process.
In the first few days, if you’re uncomfortable, try wearing a sling to ease some stress on the joint. Most people don’t require the use of a sling, but if you are really struggling with pain, this may help in the initial few days. But you want to ditch the sling as soon as tolerated.
Ice is another good analgesic that will help with the swelling. If you visited a doctor, pain medications would probably be recommended, but for this self-treatment guide, that’s under your own discretion.
3. Movement
It’s important to start working on restoring movement as soon as possible following an AC joint injury. This will help speed up the return to activity and avoid other shoulder complications.
Initially, if you’re in significant pain or too afraid to move your shoulder, start with the basic pendulum exercise to help restore range of motion.
Otherwise, you’re good to go with basic rotator cuff work and scapula stability exercises below shoulder height.
When dealing with an AC tear, reaching across the body and overhead are the most aggravating motions, but basic pulling movements are usually ok. For this reason, the Crossover Symmetry program would not be appropriate at first, but you can still use the equipment to do go through your recovery work.
Use the following recovery program 2-3 times per day to help maintain rotator cuff function and scapular movement. It’s also important during this time to maintain thoracic mobility with foam roller mobilizations and side lying thoracic rotations.
Week 1 –
- Start with the pendulum exercise if needed
- 2 Sets of 10-15
- Prone Scap Retraction
- Prone Single Arm Y in a pain-free range
- Banded rows at the side from a single attachment
- Banded ER and IR in a pain-free range
Week 2-
- You should have ditched the sling and pendulum exercises at this point.
- 2 sets of 10-15
- Banded rows at the side from a single attachment
- Banded reverse fly from a single attachment
- Banded ER and IR in a pain-free range
- CS Scaption exercise to shoulder height
- 5lb Shoulder Press
As pain decreases and range of motion improves start returning to your normal activities and use pain as your guide. Pain should be less than a 3 on a 10 point pain scale and should return to baseline within 2 hours following exercise or your activity.
As functional range improves, you will progress into the full Crossover Symmetry activation program to prepare the body to return to normal activities.
Week 3-
- Progress to the full Crossover Symmetry Activation program. Start with a lighter resistance if needed.
- Start integrating sport specific training but stay away from contact.
Week 4-
- Continue with Crossover Symmetry Activation.
- Return to contact sports if pain-free, but go through 2 full practices before returning to competition.
Long Term Recovery
Most shoulder separations return to full activity without any long term complications.
Although there are some cases of ongoing nagging discomfort. For example, a study at the US Naval Academy shows 9% of Grade I tears and 23% of grade II tears continued to have pain that limited activity three and a half years later (ref).
A concerning statistic for anyone with an AC separation, but it highlights the need for ongoing care.
Continuing to promote scap movement and rotator cuff strength will help support and lessen loads placed on the AC joint. For that reason, don’t give up on the Crossover Symmetry program once you are “healed.”
Using CS Activation daily will support the long term care for a number of shoulder issues for whatever your sport or activity might be.
References
1. Deans CF, Gentile JM, Tao MA. Acromioclavicular joint injuries in overhead athletes: a concise review of injury mechanisms, treatment options, and outcomes. Curr Rev Musculoskelet Med. 2019 Feb 26
2. Virk MS, Apostolakos J, Cote MP, Baker B, Beitzel K, Mazzocca AD. Operative and Nonoperative Treatment of Acromioclavicular Dislocation: A Critical Analysis Review. JBJS Rev. 2015 Oct 27;3(10).